هواپیمای کشی و کلاس های آن
نوشته شده توسط admin در دسته اخبار و اطلاعیه ها, جزوات آموزشی, ساخت و تعمیرات, نقشه | بدون نظر
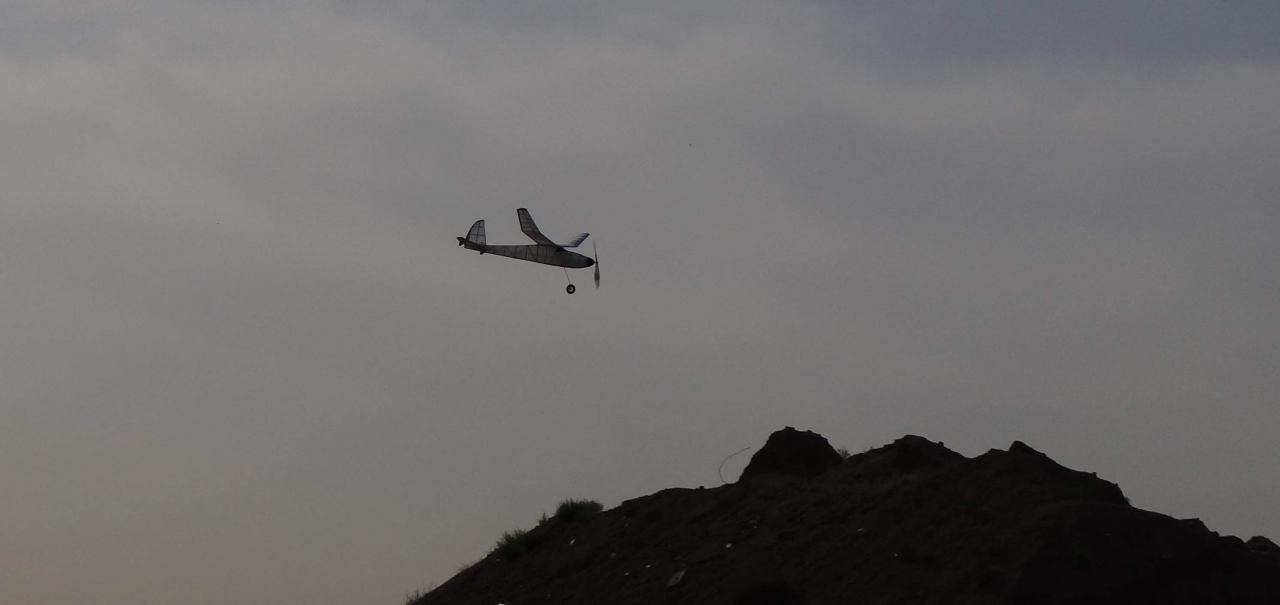
از مفرح ترین قسمت های پرواز دادن پرنده دست ساز پراندن تنه های کشی است . در این مقاله با انواع هواپیما های کشی و تقسیم بندی های آن آشنا
می شویم. زحمت ترجمه و گرد آوری با جناب آقای پژمان زارعی بوده که از ایشان سپاس داریم :
Pezhman Zare با استفاده ازمنابع wikipedia/وبسایت FAI/وبسایت Hippocket aeronatics
کلاس های مختلف هواپیماهای موتور کشی طبق طبقه بندی فدراسیون بین المللی هوانوردیFAI
بطور کلی این نوع از هواپیما ها به دو دسته کلی Indoor و Outdoor تفکیک میشوند .
در دسته Indoor کلاس F1Dو کلاس های کوچکتر F1Lو , F1M وجود دارد(دسته F1 بطور کلی مربوط به هواپیماهای پرواز آزاد است) اما توضیح محدودیتها و شرایط هریک از این کلاسها
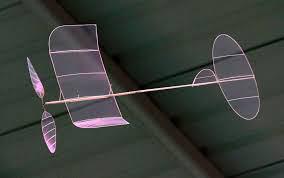
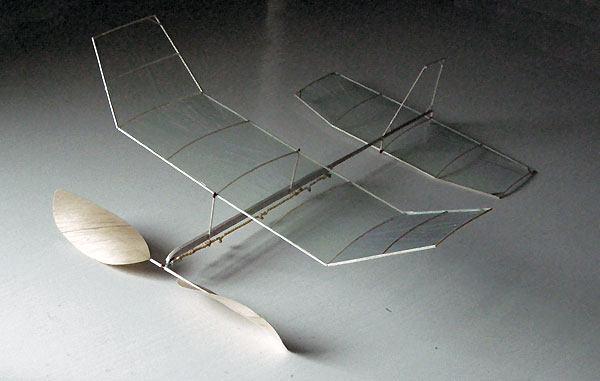
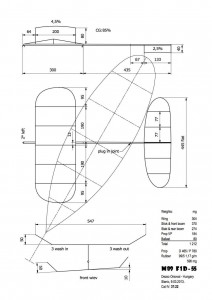
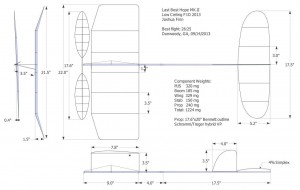
F1Dدر این کلاس اولاوزن موتور (کش) باید بالاتر ازشش دهم گرم باشد-ثانیا وزن سازه بدون موتور باید حداقل یک و دودهم گرم باشد.ثالثا حداکثر طول بال ۵۵۰میلیمتر و حد اکثر وتر کلیه سطوح لیفت پذیر ۲۰۰میلیمتر باشدMax chord of lifting surfacesعلاوه بر آن حداکثر طول دم باید ۴۵۰ میلیمتر باشد. معمولا جنس سازه از چوب بالسا بوده و روکش آن از میکرو فیلم و یا پلاستیک مشابه مایلار می باشد . در قدیم برای رو کش کردن این سازه ها مقداری دوپ روی آب ریخته میشد و پس از خشک شدن آنرا از روی آب برداشته و بعنوان کاور استفاده می کردند. مدت زمان پرواز این هواپیما ها به بیش از ۴۰دقیقه هم میرسد..
F1L-در این کلاس حداقل وزن سازه بدون موتور یک و دو دهم گرم است-حد اکثر طول بال ۴۵۷٫۲میلیمتر کمتر از چهل و هشت سانتیمتر- حداکثر وتر بال ۷۶٫۲میلیمتر – و مساحت استابلایزر پنجاه درصد مساحت بال است.
F1M-دراین کلاس حداقل وزن سازه سه گرم است -حداکثر وزن موتور یک و نیم گرم و حداکثر طول بال ۴۶۰میلیمتر است.
در دسته Indoorهرشرکت کننده مجاز به به انجام شش پرواز است و دو پرواز برتر در رده بندی لحاظ می شود. ضمن اینکه در مسابقات جهانی یک جایزه ویژه برای بیشترین طول پرواز در نظر گرفته می شود.
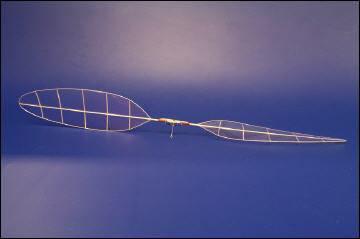
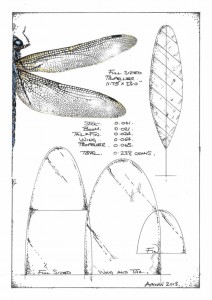
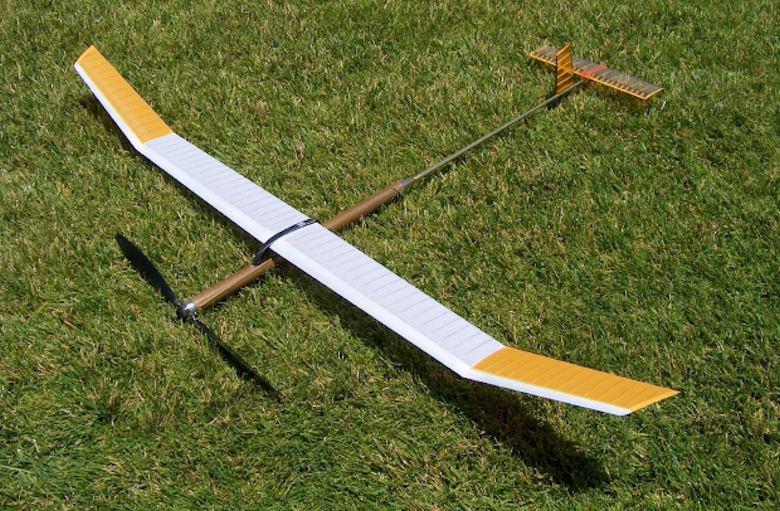
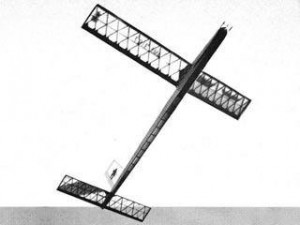
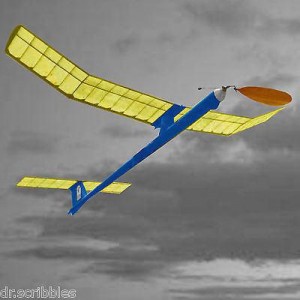
یکی از معروفترین هواپیما های این کلاسها به نام Hanger Rat است که نقشه آنرا پیوست میکنم. ضمن اینکه در بسیاری از این مدلها ملخ هم همانند بال از ساختار اسکلتی برخوردار است که در عکسها ارائه خواهم کرد.
در دسته Outdoor در کلاسهای F1B و F1Gمسابقات برگزار میشود.
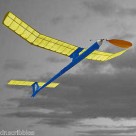
F1B-از جذاب ترین مسابقات هواپیمای موتور کشی بوده وبه مسابقاتWAKEFIELDشهرت دارد
این مسابقات در سال ۱۹۱۱توسط سر چارلز ویکفیلد بنیان گذاشته شد و تا جنگ جهانی اول انجام میشد . بعد از جنگ و از ۱۹۲۸ تا ۱۹۵۱ توسط انجمن SMAEانگلیس اداره میشد و از سال ۱۹۵۱ مسئولیت برگزاری آن به FAIسپرده شد.
این کلاس بزرگترین سازه های موتور کشی رقابت میکنند. وزن سازه بدون موتور حداقل ۲۰۰گرم .مساحت سطوح سازه ۱۷تا ۱۹ دسیمتر مریع- حد اکثر وزن کش ۳۰گرم است.
بطور معمول سازه ها با طول بال ۱۸۰سانتی متر بوده و امروزه عمدتا از جنس لوله های کربن و ملخ کربن هستند . در زمان عملکردن موتور تا حدود ۸۰متر صعود میکنند . معمولا با یک پرتاب قوی و بصورت عمودی لانچ می شوندو با استفاده از تایمر های خاص ملخ با یک ثانیه تاخیر پس از پرتاب شروع به گردش میکند. قیمت این هواپیماها از ۲۸۰۰دلار به بالا است.
کلاس بعدی با لفظ فرانسوی coupe dhiver به معنای جام زمستانی شناخته می شود. فاقد محدودیت در areaاست.حداقل وزن سازه بدون موتور ۷۰گرم و حداکثر وزن موتور ۱۰گرم است. در کلاس آزاد این دسته که محدودیت در وزن کش برداشته می شود.وزن کش می تواند تا پنجاه درصد وزن سازه باشد. هرنفر می تواند با سه هواپیما وارد مسابقه شود. پنج پرواز رسمی داشته باشد.و هواپیما ها تا حدود ۴۵متر صعود میکنند.

اما کلاس محبوب p-30در رده بندی های فدراسیون جهانی قرارندارد و بعنوان یک کلاس مقدماتی در رقابتهای ملی علی الخصوص در AMAطرفداران زیادی دارد.
در این کلاس حد اکثر ابعاد سازه ۳۰اینچ . حد اکثر وزن موتور ۱۰گرم. حد اقل وزن سازه بدون موتور ۴۰ گرم . ملخ پلاستیکی ۹٫۵ اینچ بدون هیچگونه تغییر باید استفاده شود.
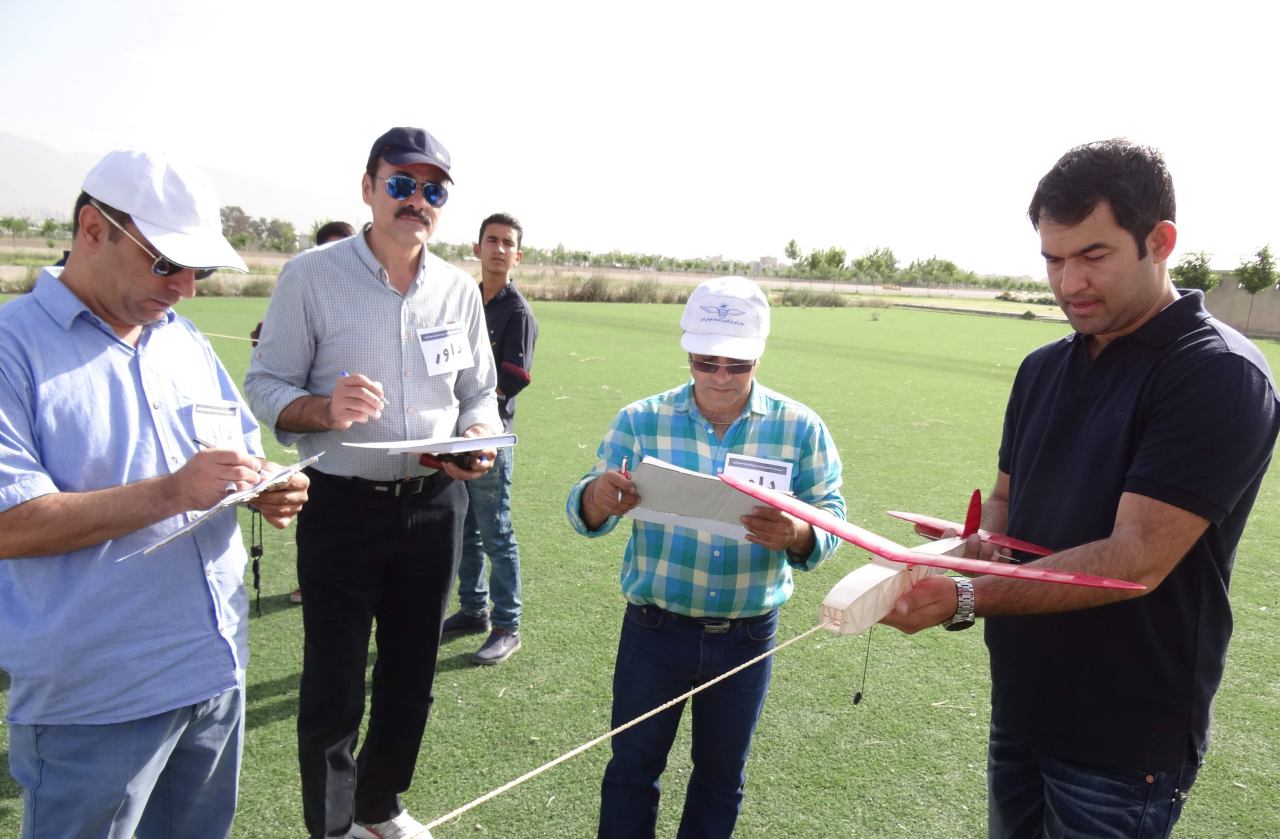
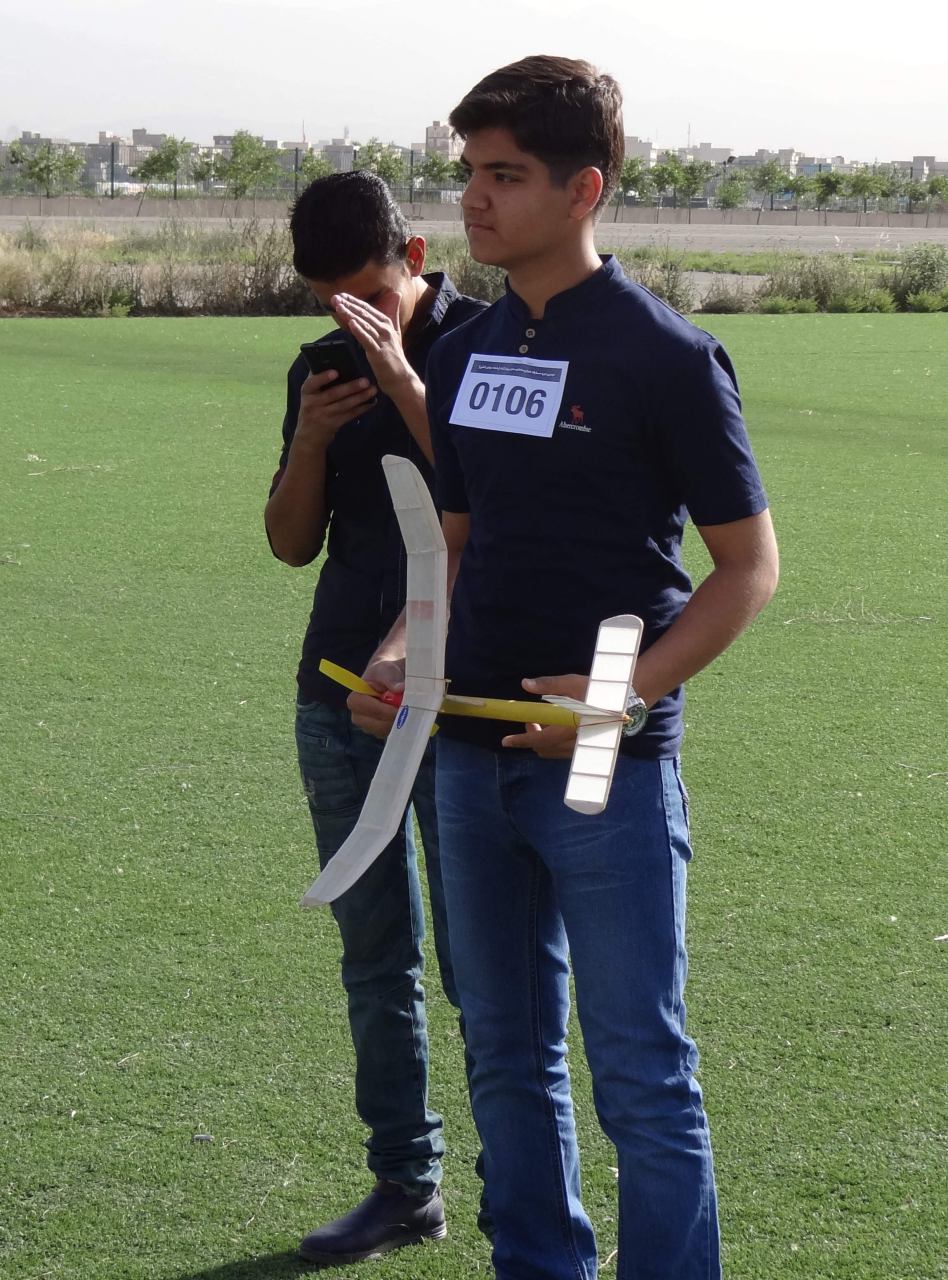
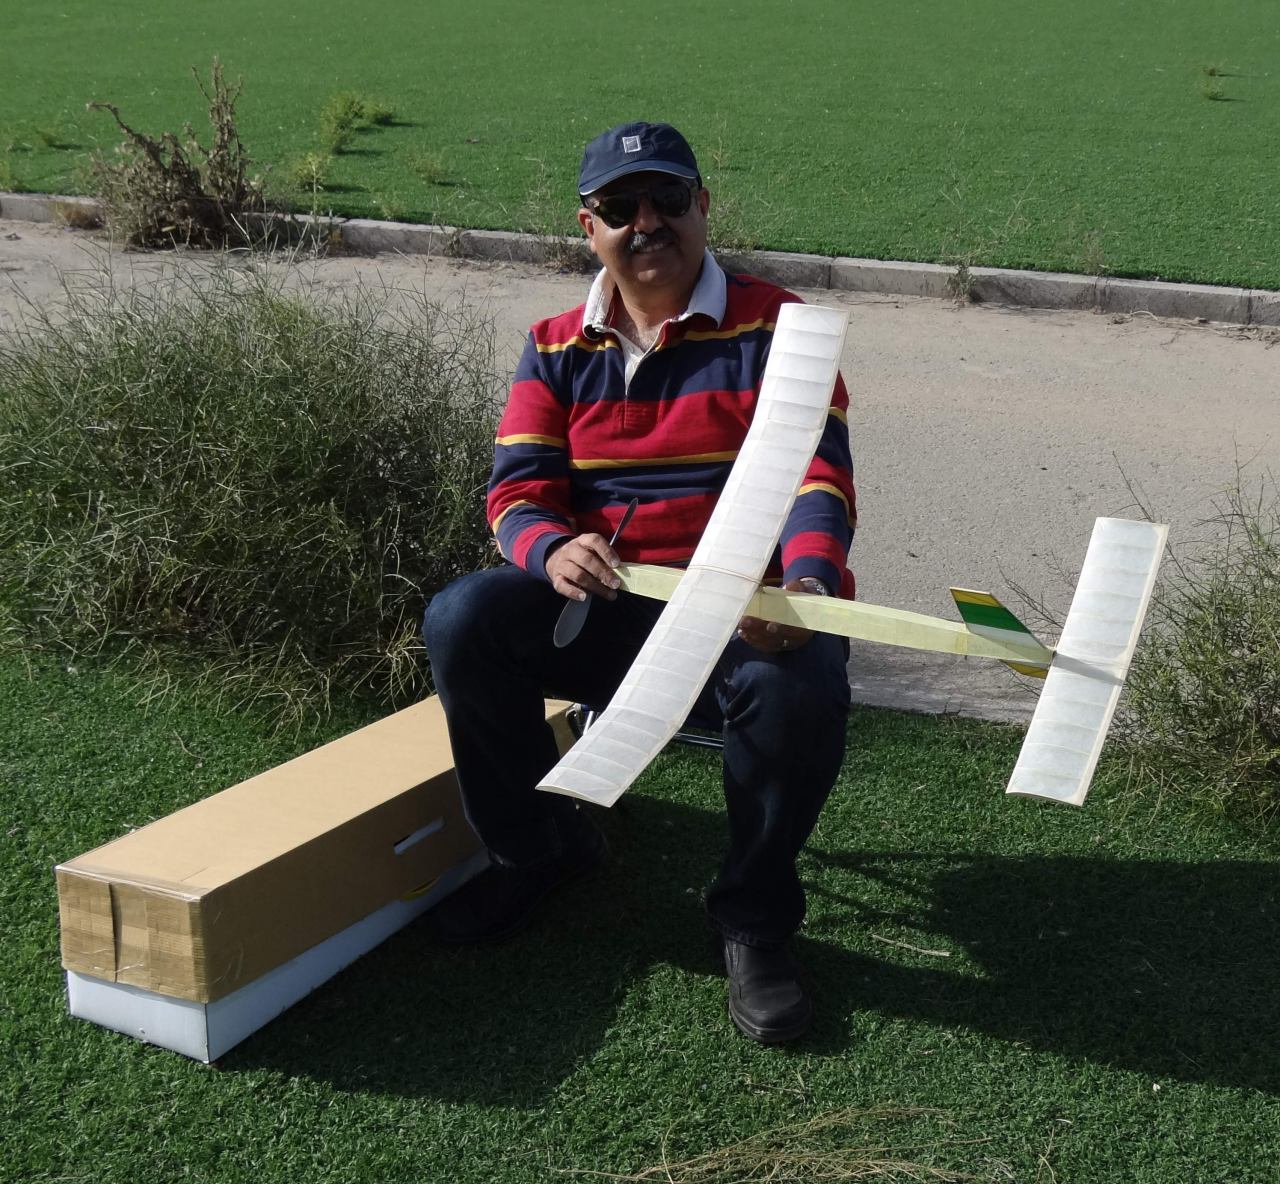
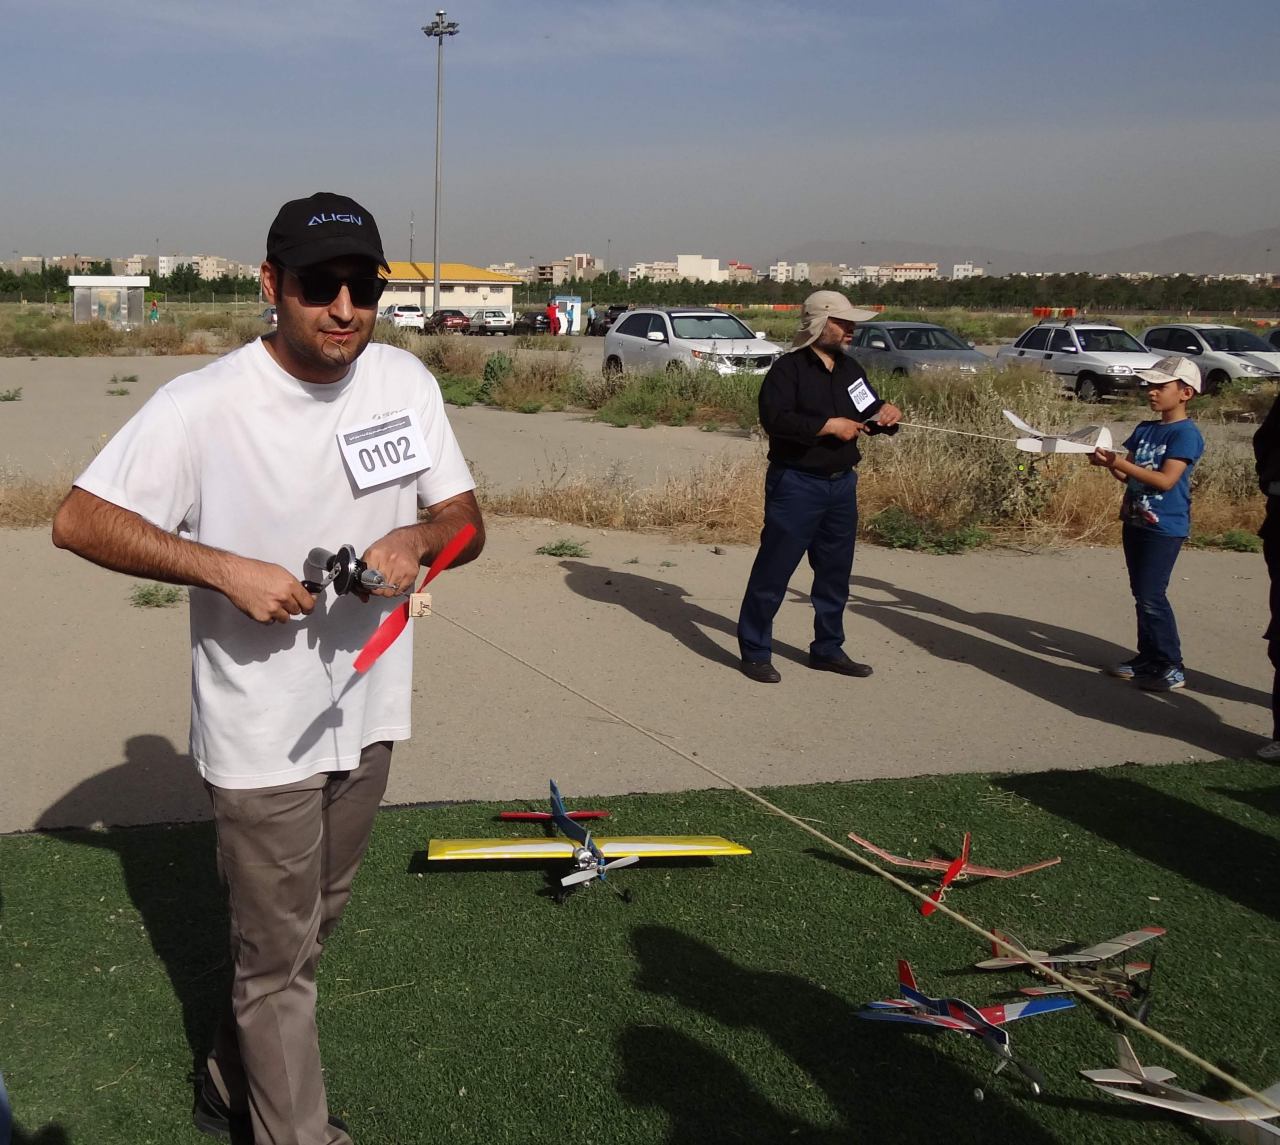
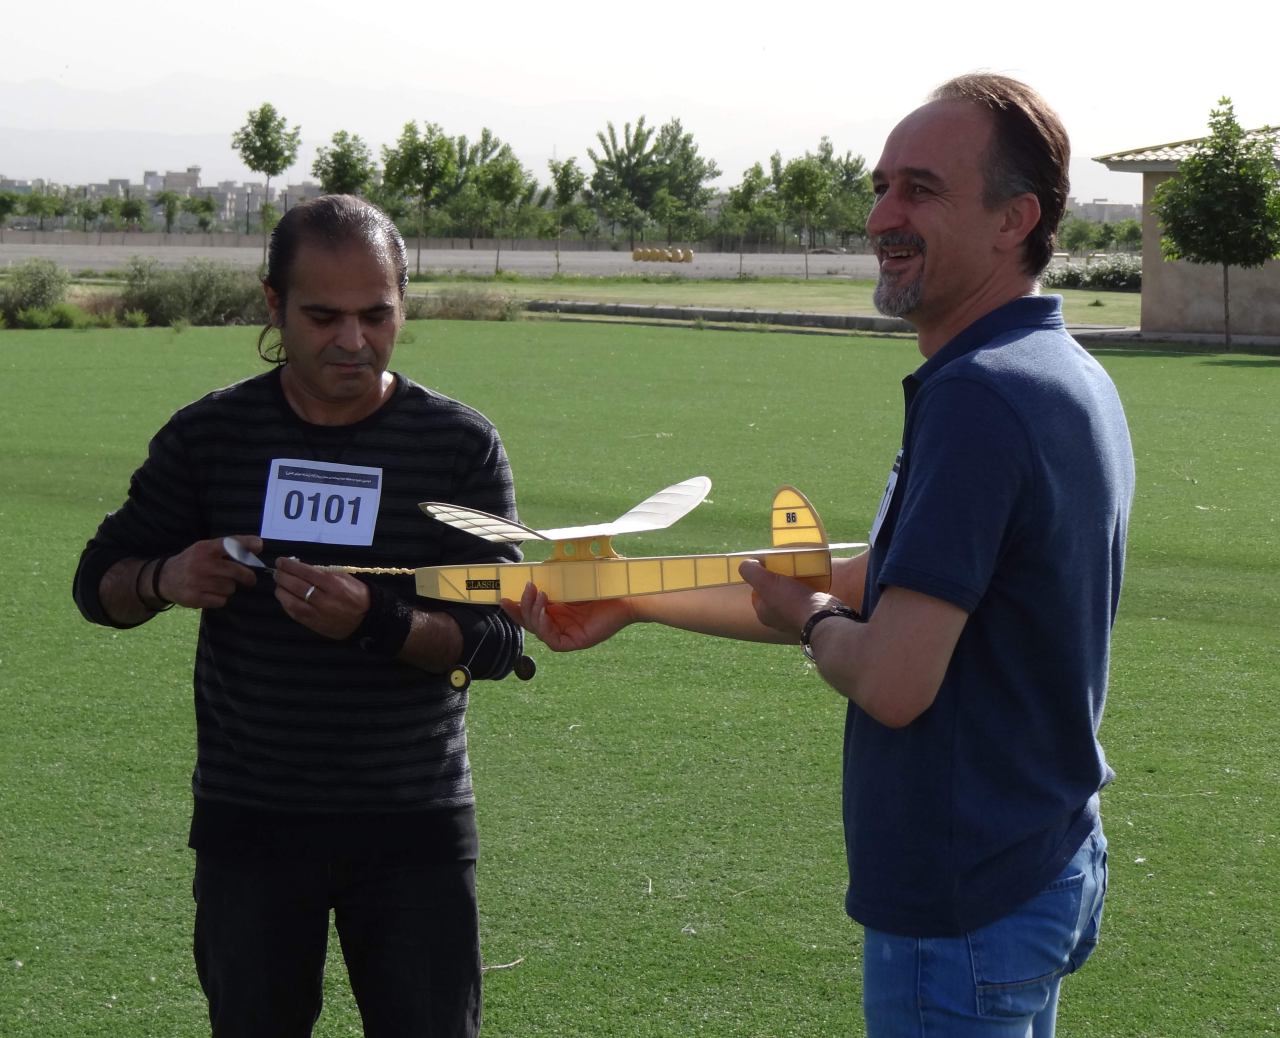
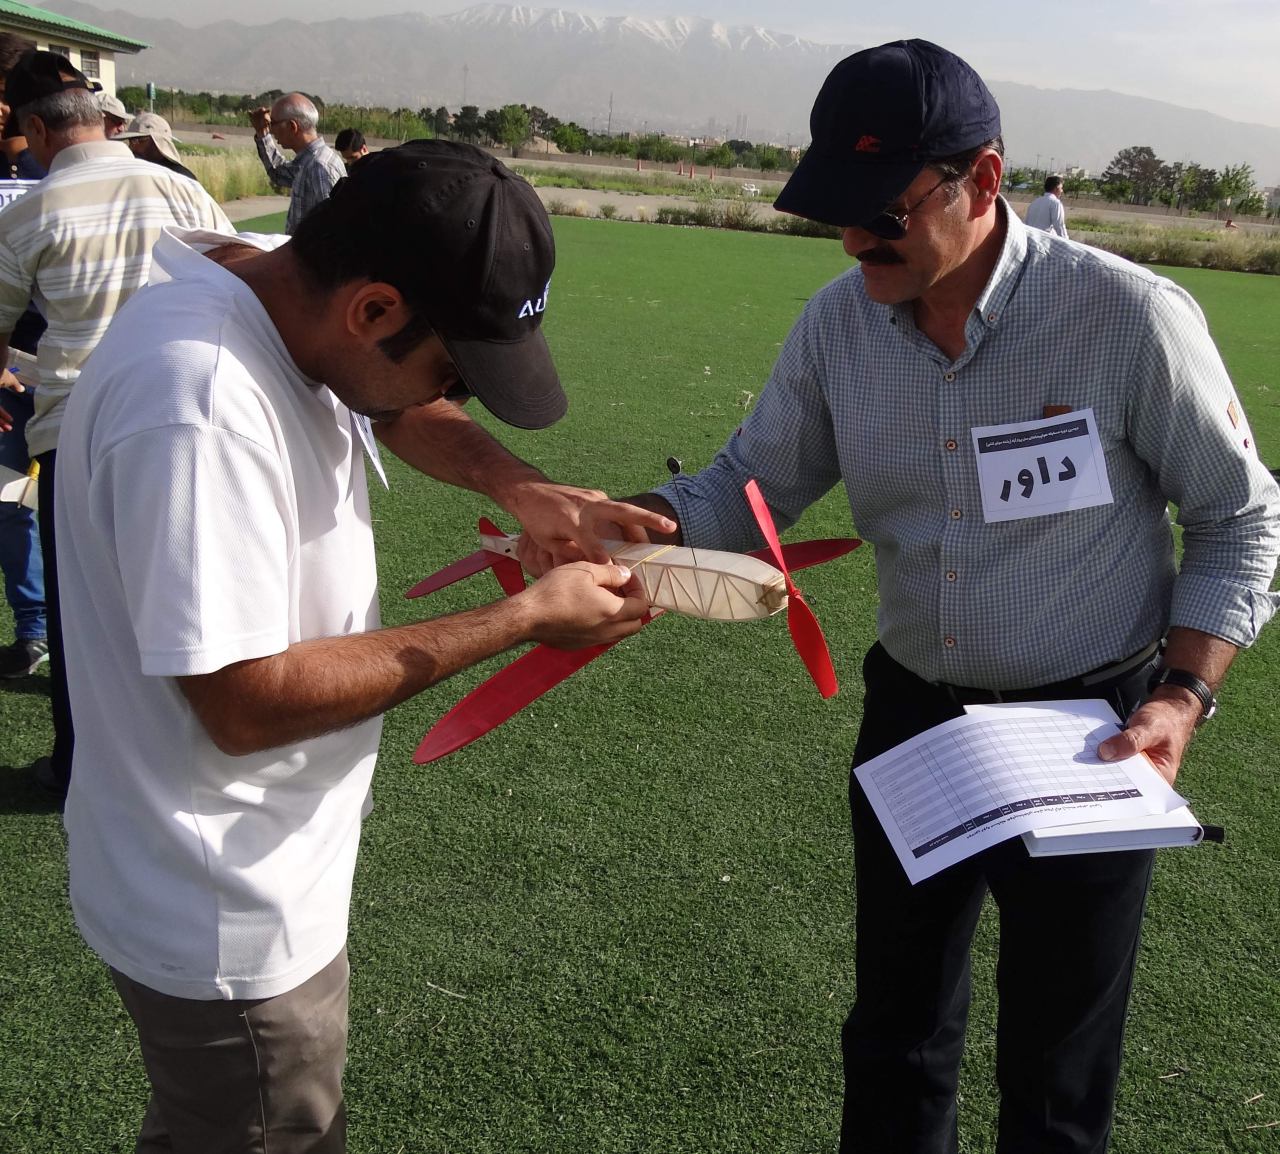
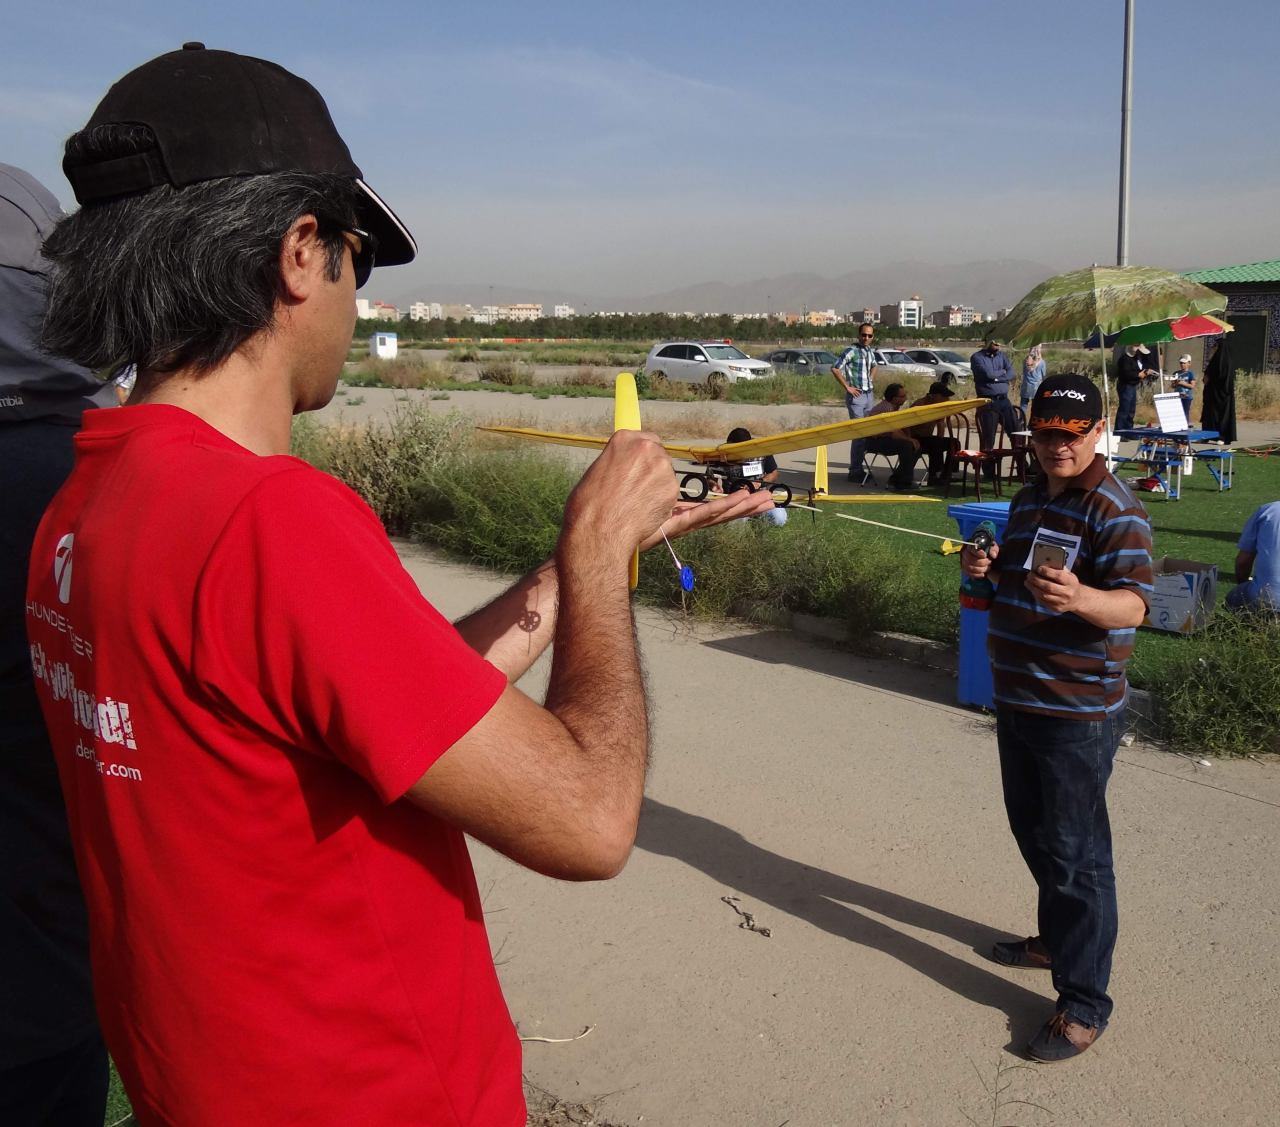
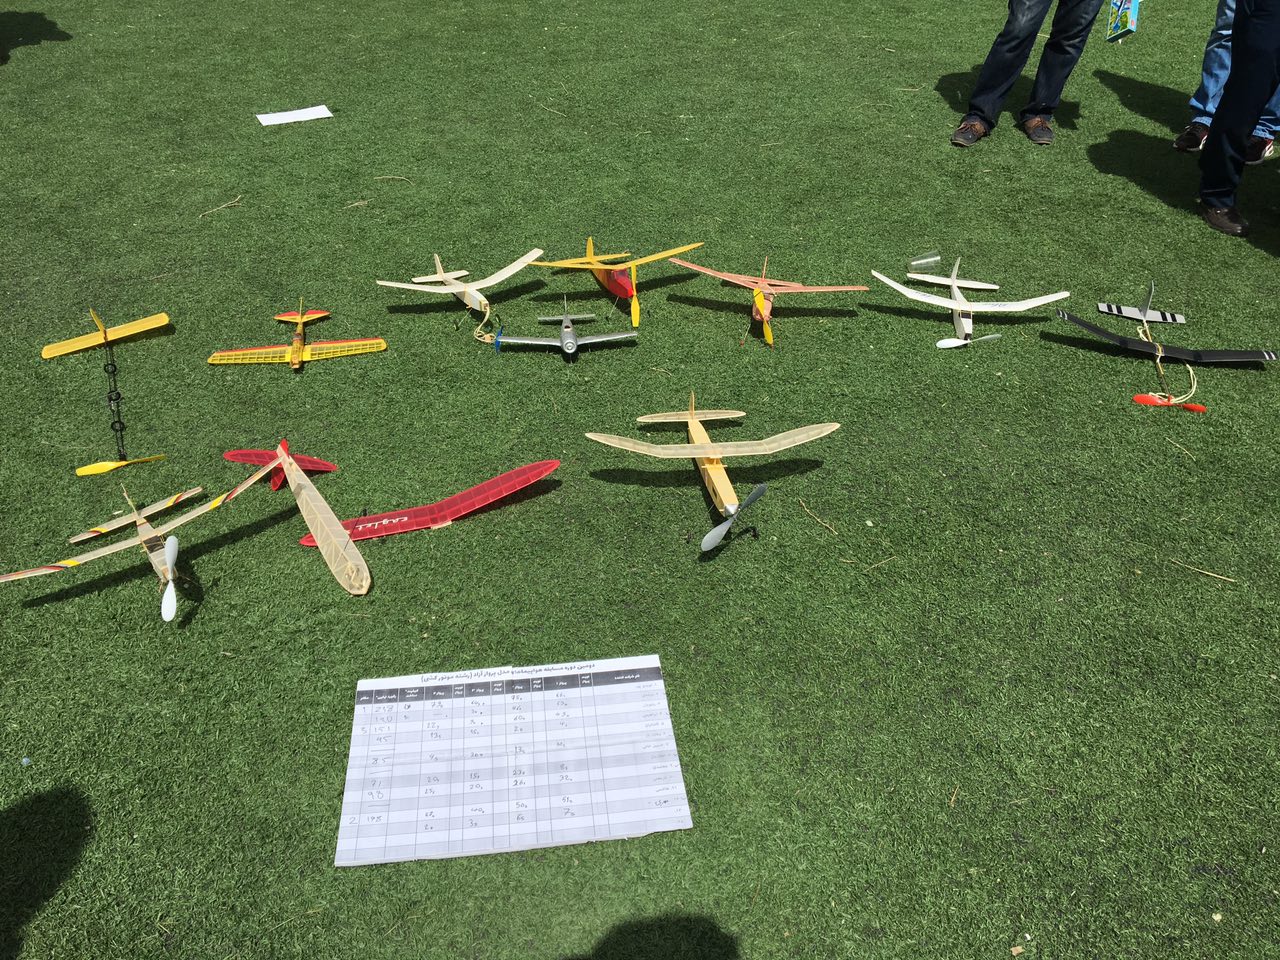
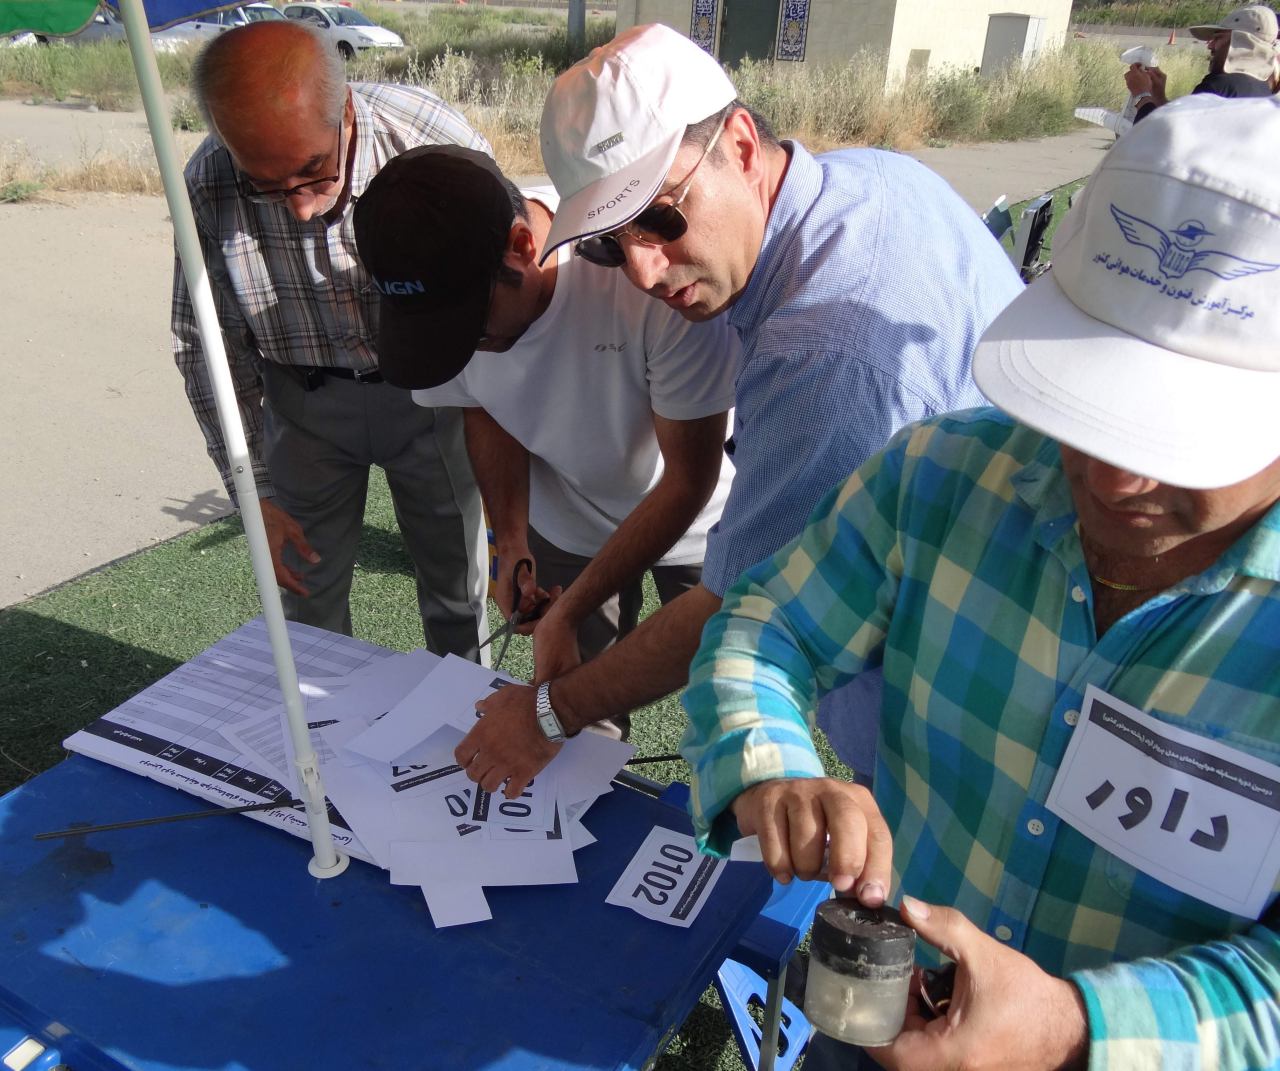
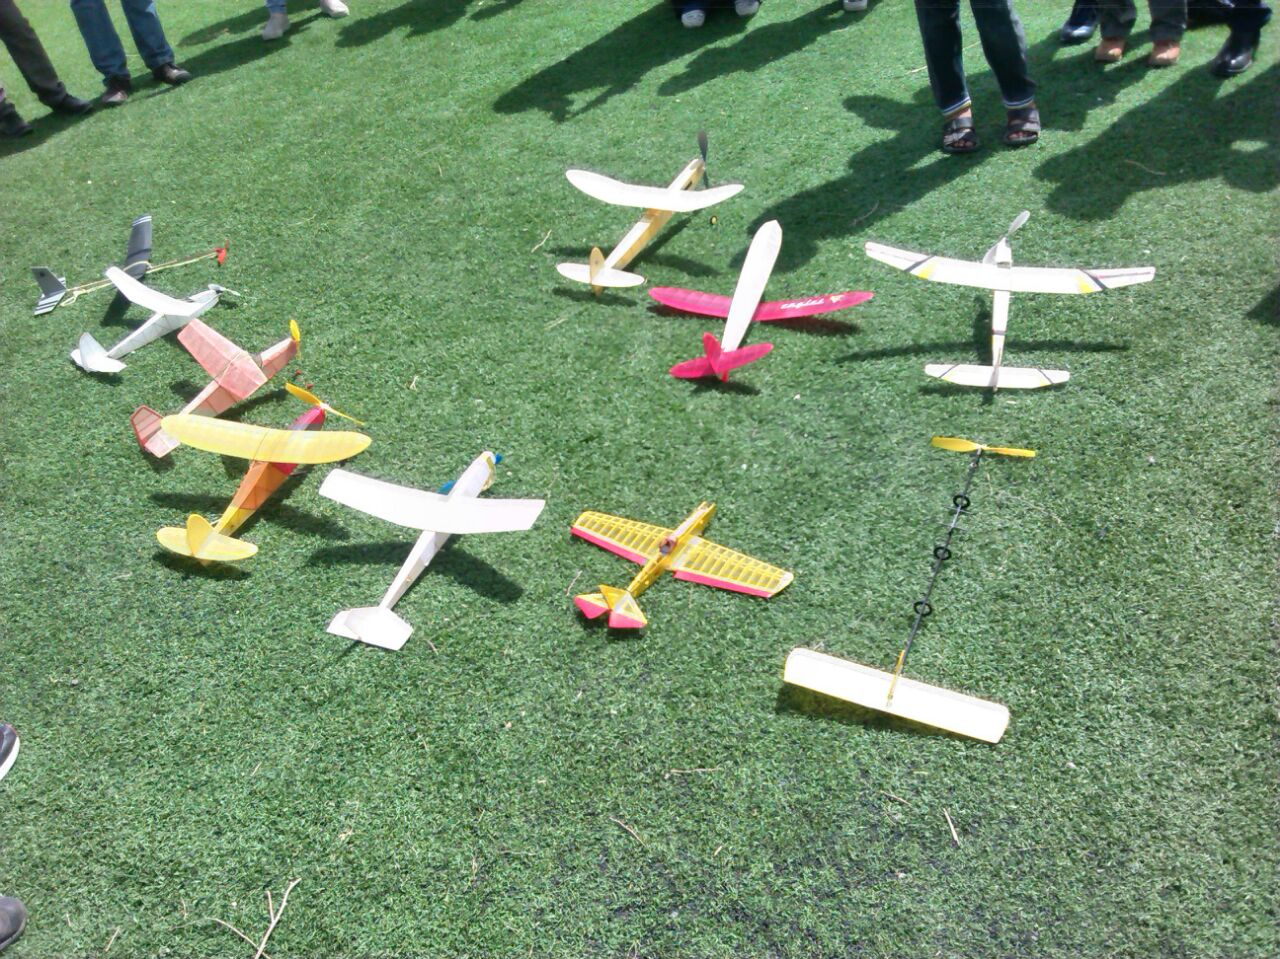
دومین مسابقه هواپیمای مدل کشی – اردیبهشت ماه ۱۳۹۵- به روایت تصویر
نوشته شده توسط admin در دسته اخبار و اطلاعیه ها | بدون نظر
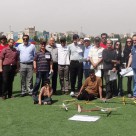
دومین مسابقه ساخت و پرواز هواپیمای کشی در مورخه ۱۷-۲-۹۵ در محل پرواز هواپیماهای کنترل لاین در پارک (بوستان ولایت ) برگزارشد .
این مهم به همت آقای دکتر احسان مرشدی مهیا و با قضاوت داوران مجد آبادی ، دلشاد ، وفاداری و اسلامی ارزیابی شد .
اسامی نفرات برتر اول تا سوم به قرار ذیل است :
۱ – آقایان نویدی پور
۲- هاشمی
۳- رضویان


مانور لوپ در لوپ داخلی – Two Consecutive Inside Loops
نوشته شده توسط admin در دسته اخبار و اطلاعیه ها, مانور هوایی - حرکات نمایشی - | بدون نظر
مقاله ای است نوشته آقای John Reid
بر گرفته از نشریه مدل ایرپلان نیوز
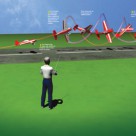
عکس زیر بروشنی نحوه انجام مانور را به تصویر کشیده لیکن جهت بهره برداری بیشتر متن آن بدون ترجمه درج گردید :

I often hear pilots refer to the loop as a simple maneuver. Simply pull back on the elevator stick until a complete loop has been flown, right? Wrong! Executing a perfect loop can be rather difficult. It must be round, must start and exit at the same altitude, the airplane must not drift in heading, and the maneuver must be centered on the pilot. Now performing two inside loops, exactly the same size with no hesitation at all, is adding a lot the maneuver. If you throw in a crosswind, the difficulty factor only increases. Let’s get started!
ONCE THE FIRST LOOP HAS BEEN COMPLETED, THE AIRPLANE SHOULD GO IMMEDIATELY GO INTO THE SECOND LOOP. THE ENTRY AND EXIT ALTITUDE MUST BE THE SAME AS WELL AS THE LOOP’S SHAPE AND SIZE.
The basics
As with perfecting most maneuvers, I recommend using a flight simulator. Practicing unfamiliar maneuvers in the comfort of your own home with a sim is great. After you do your sim time, a good airplane to practice with in the real world is the Carbon-Z Yak 54 from E-flite. This park flyer-sized plane is an excellent flyer and I used it in my latest DVD Freestyle Aerobatics Made Easy available on AirAgeStore.com. When on low rates, the Carbon-Z Yak 54 is extremely precise, making it perfect for performing the maneuver of the month.
I prefer to have all of my rates on one switch for simplicity. During this maneuver, low-rate settings will be used as a lot of control surface deflection is unnecessary and may only get the pilot into trouble. For instance, if an excessive amount of elevator is used, the pilot may experience a “tip stall.” In the past, I have seen inexperienced pilots stall an airplane and then panic. Usually they’ll apply even more elevator and moments later, the aircraft is headed towards the ground! So, with appropriate exponential settings, use only the amount of control surface deflection that is needed for a given maneuver.
For this maneuver, I recommend 25 degrees of aileron deflection with 25% exponential, 20 degrees of elevator deflection with 35% exponential, and 35 degrees of rudder deflection with 50% exponential. Keep in mind that these are just examples of rates and exponential values that work well for me with this particular airframe. When trying different rates and exponential settings, remember to always start with the factory-recommended values. Then, try different maneuvers with your aircraft and become familiar with how your aircraft responds.
Elevator input
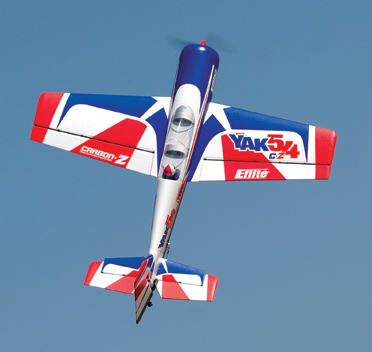
The new Carbon Z Yak 54 from E-flite is a great medium-size plane to sharpen your aerobatic skills!
If you feel that the airplane is slow to respond, you will need to decide whether you need to change the amount of exponential, the amount of surface deflection, or both. If you can pull full-elevator input and the airplane performs a gradual radius, you do not have enough elevator deflection. Personally, I want to be able to pull back about 25% on the elevator stick throughout the maneuver. Using more deflection isn’t needed for the rest of the maneuver, but it results in a comfortable feel throughout the maneuver over different flight speeds. Next, I take a look at the way the airplane responds. If the airplane is sensitive in pitch, I increase the exponential for that given rate.
Remember, exponential softens the feel of the control as your control stick is transitioning from neutral to the maximum travel point. Always determine the maximum travel on a given surface before changing the exponential percentage.
Overview
During this maneuver, the aircraft should be flown parallel to the runway and upwind. When the airplane is directly in front of you, pull back slightly on the elevator stick to initiate the loop. The loop must be perfectly round, so different elevator inputs will be needed throughout. Also, the airplane should be inverted directly at the top of the loop and upright at the bottom. Once the first loop has been completed, the airplane should go immediately into the second loop. The entry and exit altitude must be the same as well as the loop’s shape and size.
It is important to use your throttle so the airplane flies at a constant speed, which adds to the overall precision and presentation of the maneuver.
By the numbers
Step 1: The maneuver should be centered on the pilot, so the entry and exit points should be directly in front of the pilot. Begin by flying into the wind, upright and parallel to the runway. Once in position, advance the throttle to 80% and, as soon as the airplane is directly in front of you, pull back slightly on the elevator. Remember, the first 90 degrees of the loop will determine the size of the loop. A gradual pull is best for a larger maneuver that doesn’t look rushed.
Step 2: Throughout the loop, use both the throttle and elevator inputs. After the first 90 degrees of the loop, start releasing some elevator input as the airplane naturally has a tendency to arc around the top of the maneuver. If airspeed begins to decrease, add power, and add some rudder if the airplane begins to drift off heading. After the first loop is 50% complete, reduce throttle to idle and apply more elevator input. Vary elevator input as necessary to keep the loop round.
Step 3: As the airplane is between the 75% and 100% completion points, advance the throttle again and apply more elevator so the aircraft exits the first loop at the original starting point of the maneuver at the same altitude. The throttle should then be advanced again to 80% power setting to start the second loop.
Step 4: Since the two loops are continuous, there should be no hesitation between them. Now perform the second loop exactly as you did the first one and then exit the maneuver, at the same altitude and heading in which this maneuver began.
As you can see, this can become quite a complex maneuver to perform. Remember to start every maneuver with the correct aircraft orientation. I’ve often seen pilots perform a loop with the wings in a banked angle. As a result, the airplane spirals around instead of performing a perfectly vertical loop. While various corrections may be necessary, a perfectly wings-level entry will decrease your workload so you can focus on performing the maneuver.
The workload also increases when winds exist. If a strong headwind exists, a gradual pull on the elevator is necessary, but you will soon have to pull harder around the first quadrant of the maneuver to the second, as the wind pushes the airplane rather quickly. Also, you will need to continue to pull between the third and fourth quadrant as wind will otherwise push the airplane far away from the desired completion point. Aside from the elevator surface, rudder will also be necessary so the flight path, throughout the entire maneuver, remains parallel to the runway.
Final thoughts
Certain maneuvers push the pilot to both develop their flight skills and to fine-tune their aircraft. Flight consistency is a combination of both the pilot and his aircraft. Spend time to adjust your aircraft so it performs the way you want it to. Then, you can concentrate on performing the maneuver—not on correcting your model’s flight path.
Even with a properly adjusted plane, you will find that it can become quite difficult to perform two proper loops, one right after the other, while making them exactly the same size and shape. As always, practice makes perfect!
ادامه مطلبتیک آف همراه با اسنپ
نوشته شده توسط admin در دسته مانور هوایی - حرکات نمایشی -, مفاهیم پایه | بدون نظر
مانور ی بلافاصله بعد از بلند شدن ( تیک آف )
Takeoff with a Snap Aug 01, 2012 1 Comment by Debra Cleghorn If you are aspiring to become a better aerobatic pilot, no doubt you’re constantly searching to add excitement and variety to your flying. After all, the best aerobatic pilots are skilled when it comes to combining certain elements from one maneuver with elements from another. This month, I would like to combine the snap roll with a takeoff, so you can get attention on your flight right from the start! Before we get into a deep discussion about this eye-catching aerobatic move, we will begin by taking a look at your aircraft and how it is set up with respect to dual rates and exponential settings. Now, let’s get down to business! FIRST THINGS FIRST Many aerobatic airplanes today are advertised as being “۳D-capable,” and they have very large control surfaces so that they can perform maneuvers while in a stalled condition. However, having large control surfaces and a lot of control surface deflection is not needed for any maneuver that isn’t considered “۳D” and, with respect to this month’s move, a lot of control deflection is not needed. The goal is to perform a precise 1½ positive snap on takeoff’nice, crisp and clean! If you usually read my columns, you are aware of the fact that I prefer to use flight modes, with my dual and/or triple rates on one switch. This means that my aileron, elevator and rudder rates are on one switch. To perform the combo maneuver of the month, I prefer to use two flight modes. On my lowest rate, I have about 15 degrees of aileron, 12 degrees of elevator and 35 degrees of rudder deflection with 20-, 25- and 50-percent exponential, respectively. On my second rate, I have about 30 degrees of aileron, 25 degrees of elevator and 32 degrees of rudder deflection and 45-percent exponential on all of these surfaces. Keep in mind that values differ from airplane to airplane. When I perform any takeoff and landing, I am always on my low rate settings. Where I perform a stunt like a snap roll only feet from the ground, I switch to my mid rate settings right before the snap roll and switch back to my low rate setting when the snap roll is completed. While everyone has different personal preferences, this is the setup that has worked best for me as I do not want my aircraft to be sensitive while flying on low rates. No matter what size aircraft you are flying, whether it is a small park flyer or giant-scale, always take advantage of flight modes and adjust each rate as needed to cater to your liking. For example, once flying, if you move the aileron stick to its maximum and the roll rate of the aircraft is slow, increase the dual rate for that given rate. Similarly, if you feel that the airplane is too quick to respond around neutral but the endpoint value is great (the dual rate value), increase the amount of exponential you are using. Do this test on all control surfaces. OVERVIEW OF A 1 ½ POSITIVE SNAP ON TAKEOFF Before attempting the 1½ positive snap on takeoff, you should be proficient with performing positive snap rolls in general. When you execute this move, you must be in complete control and exit the maneuver at a safe altitude. Do not drop altitude throughout the snap roll as this can be fatal when you’re only feet from the ground! Depending on the power to weight ratio of your aircraft, your throttle percentage may differ slightly. On most of my models, I prefer to apply almost maximum power throughout the takeoff roll and then decrease power slightly once the airplane breaks ground. Then I pitch the airplane up slightly by pulling back on the elevator control stick and apply the same direction rudder and aileron. I’ll release elevator to unload the airplane and ensure that it does not drop any altitude through the rotation. Then, once inverted and after 1 ½ snaps have been performed, I’ll release aileron and rudder input and apply a touch of down-elevator to sustain level inverted flight. While this may sound simple, there are a lot of different elements that need to be perfected. FOUR STEPS TO SUCCESS Let’s divide this stunt into four steps. In this example, we will take off from left to right. Always take off into the wind. If a strong crosswind exists, take off in a direction that is favorable. Step 1. While on low rates, add about 80-percent throttle and apply rudder input as needed to keep the airplane travelling straight down the runway. With tail-drag-gers, you’ll need to hold some up-elevator and slowly release elevator input as the airplane is nearing the liftoff speed. Then, pull back ever so slightly on the elevator control stick until the airplane is in the air. Step 2. Once you are about 15 feet in altitude, flip to your mid rate and come back slightly on power if the airplane’s speed is too fast. Pull back slightly on elevator input and apply the same direction aileron and rudder to initiate the snap roll. In this case, we will perform the snap roll to the left, so we will need left aileron and left rudder. Sometimes, people are confused by the control inputs needed in performing snap rolls. When performing a positive snap roll, up-elevator is needed along with the same direction of aileron and rudder input. When performing a negative snap roll, down-elevator is needed in addition to opposite direction rudder and aileron. It is critical to time this portion of the maneuver so that the airplane will precisely execute 1½ rotations and exit inverted. Step 3. Throughout the 1½ rotation, apply throttle (if needed) to keep the airspeed up. Once the airplane nears the 1½ rotation point, you’ll need to neutralize aileron and rudder so that the airplane stops the rotation precisely where desired. This step may take some time to perfect, so altitude and familiarity is key. After all, this maneuver should only be done on takeoff if you are confident in your ability to execute snap rolls on demand in a precise fashion. Step 4. Since 1½ positive snap rolls have just been performed, you will now only have to apply down-elevator, as needed, to sustain your altitude. Once you are familiar with how to perform this maneuver, you can pull the throttle back to drop airspeed slightly and descend in altitude so that you are just inches off the ground while inverted! I have just described the perfect scenario where little to no wind is present. If a severe crosswind exists, I recommend that you perform the snap roll into the wind. For example, if we are taking off from left to right and there is a strong wind blowing in, I would snap to the left so that the airplane snaps away from you. Heavy winds may cause the airplane to drift throughout stalled maneuvers like the snap. Now you have the keys to fly the 1½ positive snap on takeoff with utmost pizzazz. I must admit, this maneuver is very exciting to both watch and perform, but it is demanding on your flight skills. Do not attempt this maneuver until you are fully capable of precisely executing snap rolls without any loss in altitude. Until next time, safe flying and always remember to have fun! BY JOHN GLEZELLIS; ILLUSTRATION BY FX MODELS
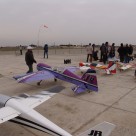
ادامه مطلبایرشو تهران ۹۱ – نمایش و اولین مسابقه پترن در ایران
نوشته شده توسط در دسته اخبار و اطلاعیه ها | بدون نظر
خداوندا
برای تمامی بانیان این مهم و دوستانی که این رویداد رو رقم زدند آرزوی تندرستی و برکت و شادمانی دارم
همیشه اولین ها سخت است و دشوار حتی اگر با سابقه ای ۵۰ ساله در ایران باشد .
بلاشک اولین مسابقات پترن رویدادی است نیک و باید از آن به شادمانی یاد کرد و به خاطر سپرد ، شروع خوبی برای سنوات آینده و انگیزه مضاعف برای مدلرهای تازه کار .
( به نظر بنده حتی جنبه آموزش برای برخی {بسیاری} از مدلهار باتجربه تر را نیز دارد ، گواه این مطلب با تستی آسان
مشخص خواهد شد از دوستانتان بخواهید صرفا ۲ مانور فور پوینت و ایت پوینت رول را انجام دهند. تطبیق اجرا با آنچه که باید باشد فاجعه است و بس )
حال چند سوال به ذهن نگارنده خطور کرده که آنها را با دوستان دیگر درمیان میگذارم امیدوارم که جاهای خالی
با تجربه دوستان تکمیل شود .
۱- چرا این مسابقه رسمی و نمایش هوایی رسما اعلام نمی شود مگر موسسه مربوطه متولی دولتی این مهم در جامعه ایرانی نیست .
( عجبا همایش می گذاریم غیر رسمی ، مسابقه اجرا می کنیم یواش ، اسپانسر داریم بک گراند )
۲- چرا مسابقه در کلاس متفاوت اعلام و اجرا نشد .
۳- تعداد کم شرکت کننده ، اعلام دیرهنگام مانورها و ….
۴- چرا این رویداد آن هم پس از ۲ سال ازآخرین برگزاری ، صرفا یک نوبت در سال و در زمستان سرد برگزار می شود .
۵- آیا به جز آمبولانسی که فراهم آورده شده بود (نقد آن باشد با دوستان ) تیم پزشکی تمهید دیده بودند .
۶- …
باز تاکید می کنم که هدف از مطالب بالا کم ارزش نمودن کار بانیان این رویداد خوش نیست بلکه امیدوارم در بهبود این مهم موثر واقع شود .
راستی یادم رفت : جای مسابقات داخل سالن هم بسیار خالی است که امیدوارم در آینده نزدیک اجرا و تکرار شود .
ادامه مطلب
تبلیغات


آخرین دیدگاها