جدول تنظیم تراست( قدرت ) موتور الکتریکی با وزن هواپیمای رادیوکنترل
نوشته شده توسط admin در دسته اطلاعات تخصصی, مفاهیم پایه | بدون نظر
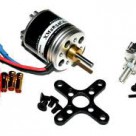
جدول ساده ای است که رابطه بین انتخاب میزان قدرت موتور الکتریکی در واحد “وات” را
با وزن هواپیما (واحد پوند =۴۵۴ گرم ) در سبک های مختلف توضیح می دهد. به عنوان مثال
گلایدری با وزن ۴۵۰ گرم حداقل به موتوری با ۵۰ تا ۷۵ وات توان نیاز دارد
وات نیز از حاصل ضرب آمپراژ در ولت بدست می آید
یعنی با باطری ۳ سل = ۳*۳٫۷ ————> 11.1 ولت * و موتور ۱۸ آمپر = ۲۰۰ وات توان خواهیم داشت
که برای هواپیمای ترینر آموزشی با ۹۰۰ گرم وزن مناسب است
|
Type of flying desired |
Watts required |
| Glider type | watts / lb – ۵۰-۷۵ |
| Trainer type plane | 75-100 – watts / lb |
| Sport / Aerobatic | 100-150 – watts / lb |
| 3d Power – overpowered! | 150+ watts / lb |
استال کردن ( واماندگی ) یعنی ؟ + فیلم آموزشی
نوشته شده توسط admin در دسته اطلاعات تخصصی, فیلم ها, مفاهیم پایه | بدون نظر
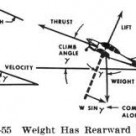
“واماندگی” یا “استال” در هواپیما و دیگر هواگردها حالتی است که در آن نیروی برآر کمتر از نیروی وزن باشد. خلبان باید فورا برای رفع این حالت اقدام کند وگرنه هواپیما توانائی پرواز را دست میدهد و نهایتاً به سقوط منجر می شود.
در اصل واماندگی حالتی است که میزان نیروی برآر به طور قابل توجه ای افت می کند. این افت نیروی برآر ممکن است به خاطر زیاد شدن زوایه حمله و یا کم شدن سرعت باشد.
حال اینکه اگر هواپیمایی دچار حالت واماندگی بشود باید قدرت موتور ها را افزایش داده و دماغه هواپیما را به سوی پایین مایل کرد و پس از رسیدن به سرعت مطمئن، با زیاد کردن زاویه حمله به حالت عادی برگشت. در رهایی از واماندگی ارتفاع از زمین تاثیر بسیاری دارد. زیرا در ارتفاع های پایین رهایی از واماندگی سخت و گاهی غیر ممکن است.
سرعت واماندگی (Vs):
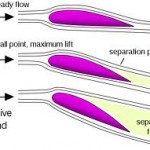
سرعت واماندگی سرعتی است که در آن، بالها فقط توانایی تولید نیروی بالابرندگی (lift force) برابر وزن هواپیما را دارند و از این سرعت کمتر هواپیما دچار استال یا واماندگی میشود که در این حالت هواپیما شروع به کاهش ارتفاع با نرخ زیاد میشود. در این وضعیت لایه مرزی که روی بال بصورت نرمال و همیشگی وجود دارد، از آن جدا شده (Separation) و ضریب نیروی بالابرندگی (lift coefficient) بطور قابل توجهی کاهش میابد. ضریب برآر بستگی به زاویه حمله بالها دارد.
فرمول کلی نیروی برآر بصورت زیر میباشد :
((L=1/2*rho*V^2*S*C(L
نیروی برآر:L
چگالی هوا:rho
سرعت نسبی:V
سطح بال:S
ضریب برآر: (C(L
حال از این رابطه میتوان سرعت استال را بدست آورد :
((V(s)=SQRT(2W/rho*S*C(Lmax
برای دریافت فیلم آموزشی اینجا را کلیک کنید ——————> – آموزش استال
ادامه مطلبچگونه در هوای سرد موتور هواپیمای خود را روشن کنیم
نوشته شده توسط admin در دسته اطلاعات تخصصی | بدون نظر
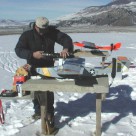
دستورالعمل ساده و روانی است برای دوستان مدلری که در مناطق سردسیر کشورمان
و یا بلاد کفر زندگی میکنند و با روشن کردن موتور مدلشان مشکل دارند .
۱۰ Steps to a Quick Cold Start
While it may not yet be as frigid as it seems in the photo above, the frost is definitely on the pumpkin! As the weather turns colder, it’s a good time to revisit some cold-engine starting techniques. Have some tips for flying in colder conditions? Leave them in the comments section!
1. Turn on your transmitter and receiver.
2. Fully open the throttle.
3. Watch for fuel in the line and cover the throttle opening with your finger. Firmly grip the propeller, and rotate it until the fuel is just up to the carb. Don’t flip it! Now turn the prop over–twice, if it’s warmer than 50 degrees F; three times, if it’s colder–to prime the engine.
4. With the glow plug disconnected, flip the engine over six to eight times.
5. Close the throttle and move the trim to fully up. This should open the throttle barrel a little more. The throttle should be about 1/4 open.
6. Grab the prop firmly, and rotate the engine until it passes through the compression part of the stroke. You should feel the engine “kick.” If it does, it will now start on the first or second flip. Always use a chicken stick or electric starter for starting. If the engine doesn’t start, flip the prop a few times with the glow plug disconnected, and try again. If it doesn’t kick now, choke it one more time with the throttle fully open, flip the prop a few more times, reposition the throttle, light the glow plug, and try again.
7. If, when your engine starts, it just revs up and quits, turn the high-speed needle valve 1/2 turn counterclockwise to open it, and try again. Repeat this if necessary.
8. If the engine starts, slows down and quits, and if a lot of smoke comes out of the exhaust, turn the high-speed needle valve clockwise to make the mixture leaner, 1/4 turn at a time. Restart the engine.
9. When the engine has started, hold the throttle partially open, and let the engine warm up for at least one minute before making the final adjustments.
10. Most engines are harder to start when they’re hot. To start a hot engine, draw the fuel up to the carb, but don’t choke or prime it. Open the throttle to 1/4. Flip the prop hard. Use and electric starter, if you have one available.
کوک کردن موتور های سوختی – بحث اگزوز و طول آن و اثرش بر راندمان
نوشته شده توسط admin در دسته اطلاعات تخصصی | دیدگاهها برای کوک کردن موتور های سوختی – بحث اگزوز و طول آن و اثرش بر راندمان بسته هستند
مطلب بسیار جالبی است در خصوص اگزوز موتورهای مدل و کوچک یا بزرگ بودن آن و تاثیر
جالب آن دربالا بردن دور موتور در سرعت های خاص این مقاله ترجمه جناب آقای
محمد رضا محمدی ملایری از گرمسار است که برای دوستان مدلر در دسترس گذاشته اند .
متن اصلی در Model Aviation Journal Oct2012 قابل دسترسی است
کوک کردن متورهای سوختی
چتر نجات برای هواپیماهای مدل و پهباد
نوشته شده توسط admin در دسته اطلاعات تخصصی | بدون نظر
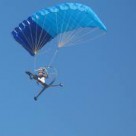
سه جزوه برای طراحی و ساخت چتر نجات هواپیماهای مدل و پهباد ها
برای دریافت اینجا را کلیک کنید —————> Everything-about-Parachute
برای دریافت اینجا را کلیک کنید —————> Parachute Recovery System Qualification
برای دریافت اینجا را کلیک کنید —————> Parachute recovery – small UAV’s
ادامه مطلب
Secrets to Knife-Edge Flight
نوشته شده توسط admin در دسته اطلاعات تخصصی | بدون نظر
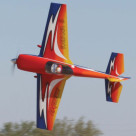
On your first attempts, it’s wise to enter your knife-edge maneuvers from a slight climb to buy yourself some extra time to think through the steps so you don’t finding yourself rushing to recover. You’ll also find it much easier to build your first sustained knife-edge if you initially roll the airplane in the same direction every time. During a sustained knife-edge, altitude is maintained with “top rudder,” the force of the air deflecting off the side of the fuselage and the upward component of the engine thrust. This is why a great deal of airspeed, thrust and rudder (yaw) are typically required to maintain altitude in knife-edge flight. Before we go any further, we need to do away with the popular but ambiguous reference to “using the rudder like an elevator” during knife-edge flight. Instead, simply remember that the rudder is always applied the opposite direction that the airplane is rolled-regardless of whether the top or the bottom of the plane is facing the pilot. So, if you roll 90 degrees to the right, you’ll input opposite left rudder to maintain altitude. By definition, the most important aspect of knife-edge flight is establishing a perfect 90-degree bank. You can quickly get a handle on this by rolling to knife-edge without worrying about the rudder for the first few attempts. When you first introduce rudder, it’s again crucial that you first establish a 90-degree bank before inputting rudder, and thus avoid the tendency to over- or undershoot the bank because you’re rushing to input rudder. At first, you may even want to briefly pause at neutral after rolling to knife-edge to make sure the wings are perfectly vertical before you apply rudder. If you become confused or you need to recover, neutralize all the controls, and then roll back to upright. BASIC KNIFE-EDGE FLIGHT Pitch up into a slight climb, roll right 90 degrees, apply opposite left rudder and hold. Maintain altitude during knife-edge by simply remembering to apply the rudder in the opposite direction in which you applied the aileron. KNIFE-EDGE WARM-UP Before introducing rudder, practice pitching the plane into a climb and rolling exactly 90 degrees. Don’t use rudder until you can first consistently roll to knife-edge with the wings perfectly vertical. EASY CORRECTIONS First attempt: Enter a slight climb, bank right 90 degrees, input full opposite left rudder and hold it. Let the deviations occur, but take note of where they are. The airplane is trying to roll out of the bank (typical). Plan to hold in a little right aileron next time. Second attempt: Enter a slight climb, bank right 90 degrees, input opposite left rudder and add a little right aileron. The plane stays banked 90 degrees, but tucks (turns) toward the landing gear. Plan to pull a little up-elevator next time. Third attempt: Enter a slight climb, bank right 90 degrees, input opposite left rudder, add a little right aileron and pull a little elevator. For future attempts, make a more shallow entry, and smoothly blend the inputs together. BUILDING A SUSTAINED KNIFE-EDGE Factors such as propwash, gyroscopic precession and P-factor won’t let most airplanes stay on their sides and/or track straight in knife-edge flight with just rudder input. But determining which corrections are needed to hold a straight line is easy as long as you don’t clutter your attempts with too many inputs; instead, build on what the airplane shows you it needs. In knife-edge, the best teacher is the airplane. For example, enter a slight climb at full throttle. Roll right to knife-edge, neutralize the aileron with the wings perfectly vertical, then smoothly apply full opposite left rudder and hold it. Don’t attempt to correct any deviations at this time. You’ll most likely see the plane roll in the direction in which you’re holding the rudder, i.e., left. Rather than correcting it, record the event in your mind while forming a plan to correct it next time with right aileron. Assuming that you successfully correct the roll tendency in your next attempt, it isn’t unusual to observe the airplane tucking toward the canopy or the landing gear. Just as you did with the roll tendency, take stock of the direction in which your airplane tucks and which way you’ll need to apply the elevator to correct this during the next attempt. Once you’ve identified the knife-edge requirements for your airplane and have developed some confidence, you can begin to gradually remove the climbing entry and start blending the inputs. In its final form, a skilled pilot applies just enough up-elevator pressure at the start of the 90º-roll to prevent the plane from dropping, but is otherwise undetectable, while smoothly adding top rudder as the wings approach 90 degrees. Then, based on prior observations, he or she blends in the aileron and elevator inputs required to hold a straight line.
ادامه مطلب



آخرین دیدگاها